![[Updated] In 2024, Getting Started with OBS on Apple A Comprehensive Guide](https://thmb.techidaily.com/72ad6224a96d1332d870ccac31eeed89a25da9895e91d61d746d246092f66e50.png)
"[Updated] In 2024, Getting Started with OBS on Apple A Comprehensive Guide"
Getting Started with OBS on Apple: A Comprehensive Guide
OBS Studio has evolved into one of the most powerful audio recording software on the market today. Using OBS game capture, you may record screen games for YouTube videos or share snippets of gameplay with your friends for free. With this article, we’ll cover how to record in OBS and how much storage space you’ll need for your recordings. With OBS, it’s easy to keep track of high scores, great in-game performances, and even tips on how to play like a pro quickly and effectively. Since gamers may use several third-party screen-recording techniques when recording their games, learning how to record gameplay using OBS is an ideal solution. An open-source tool called OBS (Open Broadcaster Software) will be utilized in this lesson.
It is widely utilized by both large and small broadcasters throughout the world because of its reliability as a streaming solution. Despite this, it’s an effective tool for capturing images. OBS Studio enables you to record video directly to your device instead of broadcasting your screen. The days of framed screenshots and complex settings are over. Video game streamers and teachers with a lot of video presentations are likely to be acquainted with the OBS Studio. However, due to the complex user interface, it’s a little tough for beginners to utilize. The good news is that there are a variety of OBS options to pick from. When it comes to performance, it’s on par with other, more costly options. For the most part, the program allows for live streaming to several sites, such as Facebook Live and Hitbox.

1. Download and Install OBS on Mac
OBS is an open-source screen recorder and live streamer that is free to use. It’s now available on Windows, Mac OS X, and Linux. It’s a popular choice among more seasoned customers because of the large variety of options available in the product.
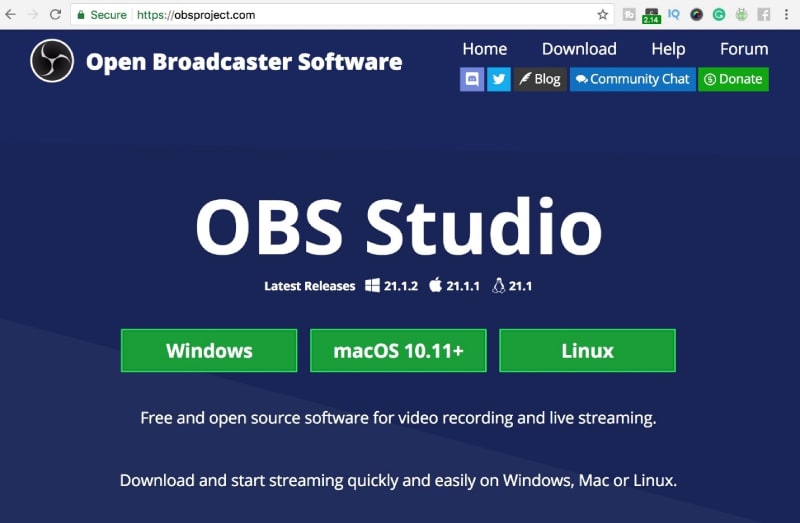
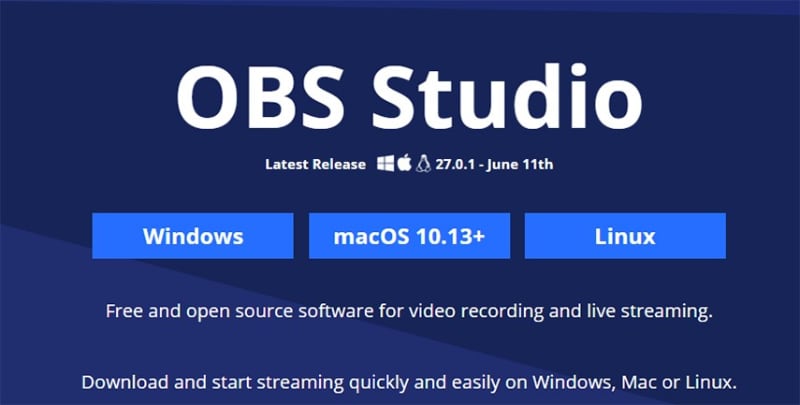
Step 1: Go to the OBS Website
Go to the OBS download page using your choice browser and save the installation file to your computer’s hard drive.
Link: OBS Website
Step 2: Get the Most Recent Version of the Software
You may get the most recent version of OBS for Mac by clicking the button on the OBS website.
Step 3: Download and Install the Software for Mac
Open the package after downloading it. Drag the OBS icon to the Applications folder when the installer has been opened.
Step 4: Get Started!
Open OBS for the first time by going to the Applications folder and double-clicking on it. Selected ‘Continue’ will bring up a Welcome Screen for the Installer.
 Forex Robotron Basic Package
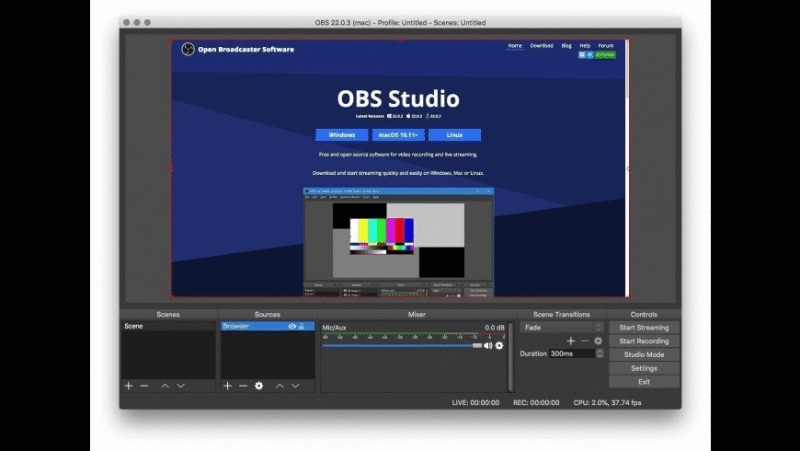
 Glarysoft File Recovery Pro - Helps to recover your lost file/data, even permanently deleted data.
2. Best OBS Settings for Mac
OBS Studio is a complex software that comes with pre-installed screencasting capabilities. Free software often lacks the breadth of features required for flawless broadcasting, but not with OSB Studio. Even though the program is free, it features all of the crucial components that characterize online broadcasting. Many additional parts and modules will be given by the software now and then. That suggests it’s really necessary to dabble and refresh with it. Else, you can experience a few hassles in using OBS correctly.
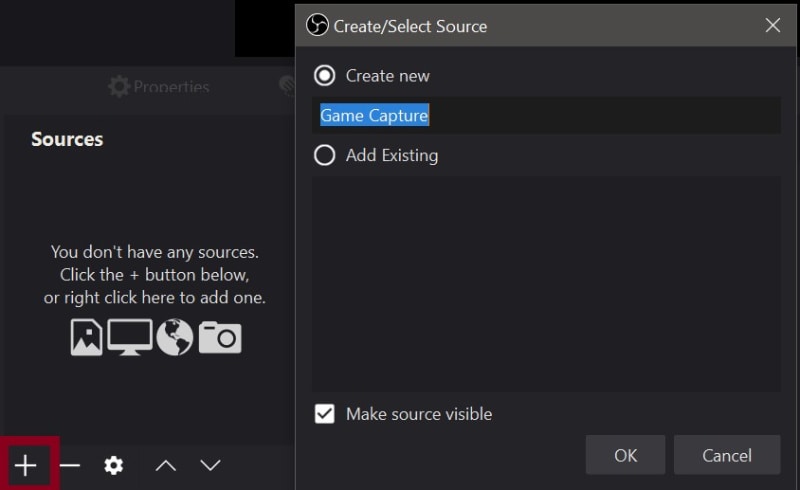
Step 1: Launch and Create Output Recorder Setup
Add on the Plus symbol and create the project. If you want to activate audio monitoring in OBS Studio: Right-click in the Output box, Open the Output mode or you can also go for Advanced Audio Properties:
Step 2: Customize Record Only Feature
In OBS for Mac, this setting will deliver the sound of the source to the Desktop as it were. Work area sound should be enabled for the sound to be captured. As soon as you activate this option, navigate towards the recording interface.
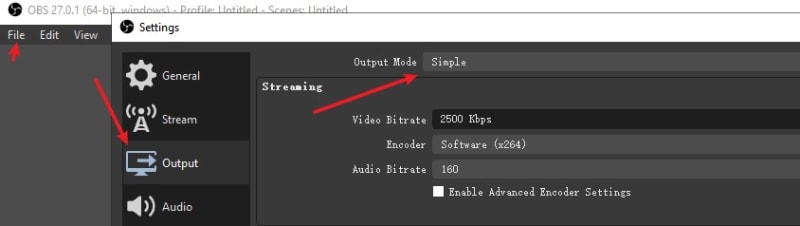
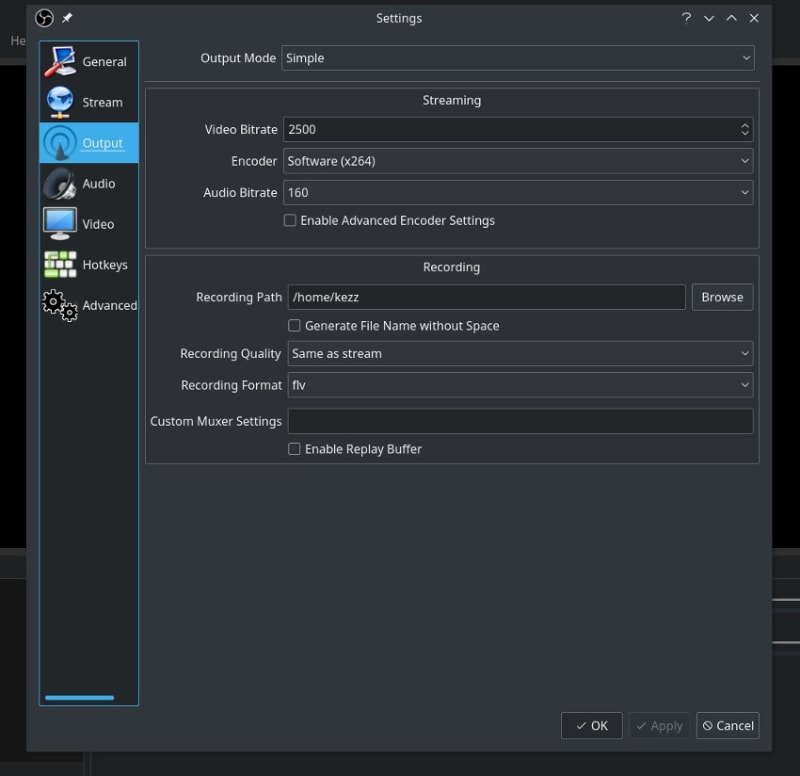
Step 3: Set the Screen and Output Mode
In OBS Studio for Mac, this setting will broadcast the sound of the source to the stream and Desktop sound separately. This takes into mind individual sound control. To do so, go to the bottom right corner of your screen and pick “settings.” Then, under “recording path,” select the “output” option to specify the spot on your computer where you desire to keep the recordings. Right after that, press the Record button to start recording your Game Audio in parallel.
3. How to Record Screen with OBS on Mac
OBS Studio is open-source, free software that is worth a try for all users. This strategy may be used to solve the problem if you have two graphics cards, one of which is NVIDIA. The OBS black screen is most likely caused by OBS and the game you desire to record running on different graphics cards in this situation. The image of the game can’t be acquired as they’re on separate adapters, and it’s not available on the device OBS is utilizing.
Step 1: Install and Launch OBS
To purchase OBS Studio, go to the OBS Project’s official website and join up for their download portal. OBS is available for download and installation. After that, determine whether you want to use Windows, macOS, or Linux. Click the “Windows” download option on the left to acquire OBS for Windows. After clicking it, the download for OBS Studio will begin and the user will be able to locate it on their computer.
Step 2: Add Scenes for Recording
OBS Studio will be available on their PC when the installation is complete, and players may use it to record their Valorous games. The software, on the other hand, does not come pre-configured for recording and must be set up manually. Scenes should be added. Open OBS and go to the bottom left of the screen to the “+” icon below “scenes.” Add a “recording” scenario to the mix.
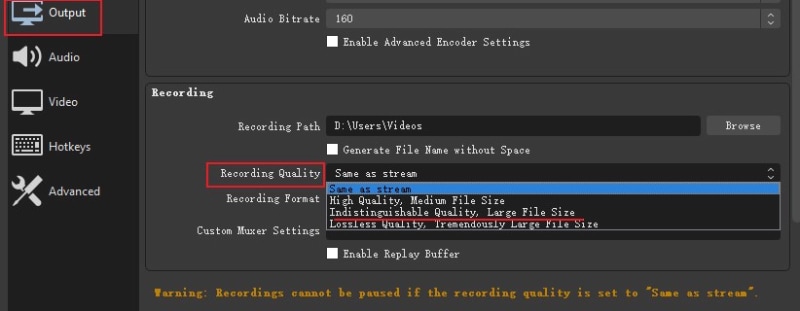
Step 3: Customize the Recording
Users should go to the Output tab and set the Video Bitrate to 6000 Kbps, Encoder to Hardware, and Audio Bitrate to 256 after entering the settings. Users may also adjust the location of their recording by choosing the save path location in the same settings tab., in the “recording” scene, click the “+” sign below “sources” on the bottom left of the screen, and add a “display capture.” If you have more than one monitor, specify which one you wish to record.
You may add a “Video Capture Device” to capture your webcam and an “Audio Input Capture” to gather the sounds from your microphone if you wish to. The next step is for users to go to the Audio tab and deactivate Desktop Audio. Users may add an audio input device, such as a microphone, by setting the Mic/Auxiliary device under the same tab.
Step 4: Setup the Recording
Now, in the bottom left corner of the screen, click the “Scene” button, and then tap the Add icon next to the scene tab under the sources tab. A drop-down menu will display after selecting the add button, enabling you to add Game Capture and Audio Output Capture. Two more tabs will appear under the sources tab, which must be set. Choose a shooting location as well as a video type. Finally, pick “recording format” and “mp4” (or any other file type) from the drop-down menu. In the “Best Parameters for OBS Recordings,” we’ll go over various additional variables that need to be modified to ensure high-quality outputs.
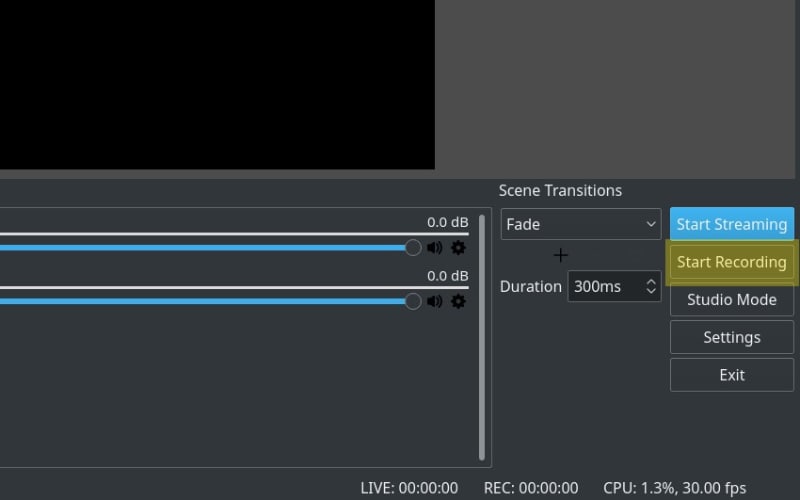
Step 5: Start/Stop Recording
Users may start recording their gameplay by hitting the “Start Recording” button on the bottom-right of OBS Studio when everything is set up. To stop recording, simply press the Stop Recording button, and the video will be saved at the previously set location. Now is the moment to hit the “start recording” button.
4. Alternative Way to Record Screen on Mac
Filmora is an easy-to-use and free OBS alternative with a basic user interface. This program, like OBS, allows you to capture your screen in several ways, including full screen, half of the screen, and so on. It’s also an excellent audio recorder that enables you to capture system sound or microphones with a few simple clicks. Filmora contains a trimmer, which means you can easily alter your recorded files within this screen recording software, which is better than OBS. The recording option is a terrific method to capture games, a camera feed, or a display capture and keep it on your local device for sharing or editing later. You may use it to record any section of your screen and add narration from your microphone as well as video from your camera. You may add text, shapes, and photos to your video while it’s being filmed. Furthermore, this program allows you to simply construct interesting animations and flawless transitions. Here are some insights into it.
For Win 7 or later (64-bit)
For macOS 10.12 or later
How to Record Streaming with Wondershare Filmora
Step 1: Download and Install Filmora
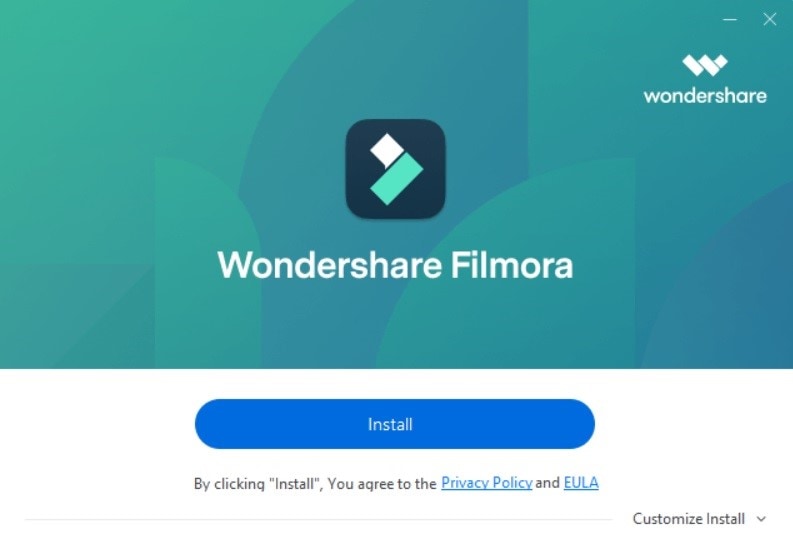
To begin with the Wondershare Filmora video recorder, you need to download the software. After you have downloaded the Wondershare Filmora file, it is time to install the program. To do so, open the downloaded file and follow the usual instructions to proceed further. After you are done with the installation, access the masterpiece from your desktop.
Step 2: Set Up Your Screen
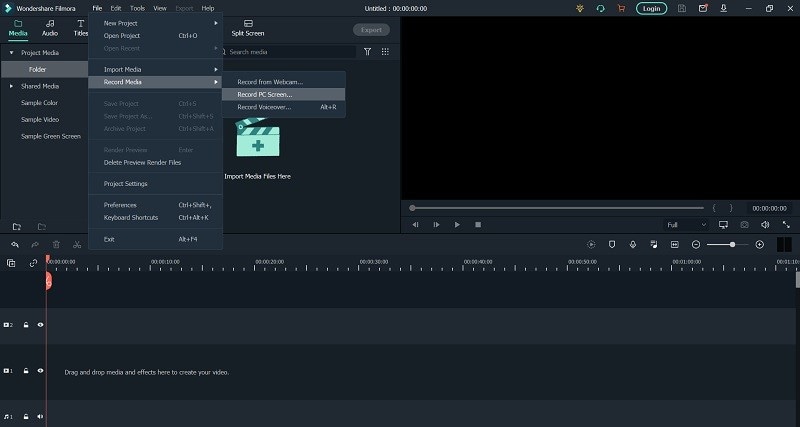
After starting Wondershare Filmora, you should see the following interface. Now you need to click on the Capture button, to begin with capturing your video screen:
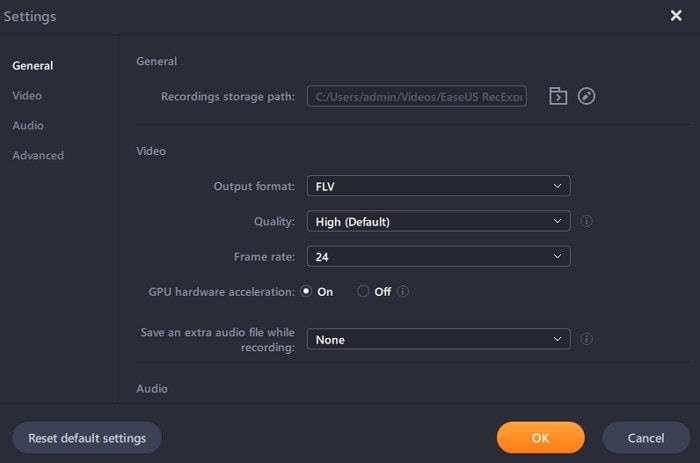
Select the screen area which you wish to capture in your final film. Customize the parameters of your recording in the corner settings box with the Filmora title. Just click on the options tab and adjust your recordings as you wish.
Step 3: Start Capturing
Step 3: Start Capturing
After you are done with the settings, launch the game which you want to incorporate in your game video production. As soon as you arrive at the game, go with the game interface until you want it to include.
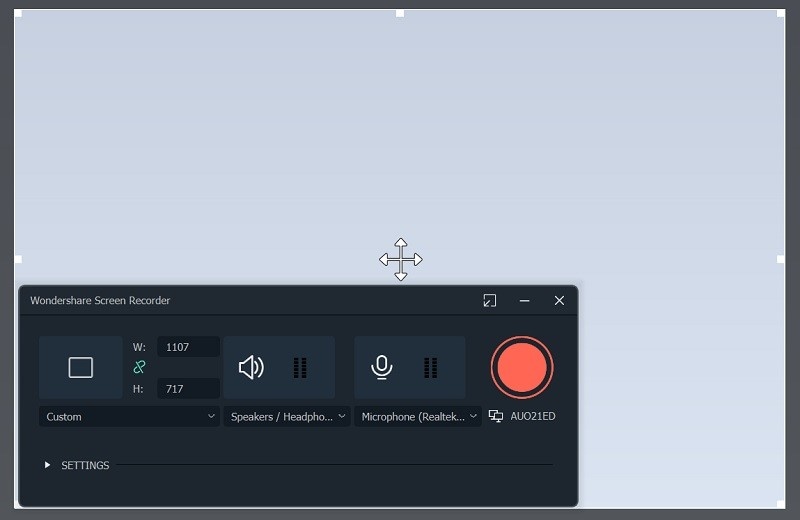
Just press the red-dotted Filmora button as soon as you get to a place where you wish to record your game playthrough. Now that you’ve completed this step, you may begin capturing your screen.
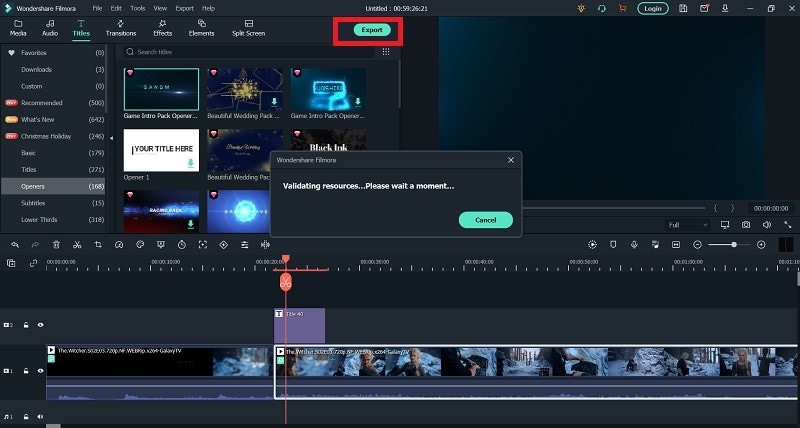
Step 4: Directly Share to YouTube
The post-production editing capability may also be used to improve the recording. There are a few ways to do this, such as by clicking Export at the top of a video editor’s interface and then following the on-screen instructions. For easy uploading to a social media network like YouTube, just choose the video in the list and login into your channel.

Conclusion
Unlike OBS, which only offers a few recording options, Filmora includes all of them. You may also add screen inscriptions and your camera footage as an overlay to the material you are recording using this feature. This device is also capable of capturing audio from the receiver. In just a few seconds, you may capture images and videos from your computer’s screen, make comments, and share them with others. You’ll need to put in some effort to figure out how OBS works. In comparison to other screen capturing apps, this one is unquestionably more difficult to use. For this reason, we’ve compiled the best of the top OBS alternative for your perusal – Wondershare Filmora. Whether you want to record your interaction, capture the video on your PC, or broadcast it live, an all-in-one OBS alternative has an option for you.
For macOS 10.12 or later

How to Record Streaming with Wondershare Filmora
Step 1: Download and Install Filmora
To begin with the Wondershare Filmora video recorder, you need to download the software. After you have downloaded the Wondershare Filmora file, it is time to install the program. To do so, open the downloaded file and follow the usual instructions to proceed further. After you are done with the installation, access the masterpiece from your desktop.
Step 2: Set Up Your Screen
After starting Wondershare Filmora, you should see the following interface. Now you need to click on the Capture button, to begin with capturing your video screen:

Select the screen area which you wish to capture in your final film. Customize the parameters of your recording in the corner settings box with the Filmora title. Just click on the options tab and adjust your recordings as you wish.
Step 3: Start Capturing
Step 3: Start Capturing
After you are done with the settings, launch the game which you want to incorporate in your game video production. As soon as you arrive at the game, go with the game interface until you want it to include.

Just press the red-dotted Filmora button as soon as you get to a place where you wish to record your game playthrough. Now that you’ve completed this step, you may begin capturing your screen.
Step 4: Directly Share to YouTube
The post-production editing capability may also be used to improve the recording. There are a few ways to do this, such as by clicking Export at the top of a video editor’s interface and then following the on-screen instructions. For easy uploading to a social media network like YouTube, just choose the video in the list and login into your channel.
Conclusion
Unlike OBS, which only offers a few recording options, Filmora includes all of them. You may also add screen inscriptions and your camera footage as an overlay to the material you are recording using this feature. This device is also capable of capturing audio from the receiver. In just a few seconds, you may capture images and videos from your computer’s screen, make comments, and share them with others. You’ll need to put in some effort to figure out how OBS works. In comparison to other screen capturing apps, this one is unquestionably more difficult to use. For this reason, we’ve compiled the best of the top OBS alternative for your perusal – Wondershare Filmora. Whether you want to record your interaction, capture the video on your PC, or broadcast it live, an all-in-one OBS alternative has an option for you.
For macOS 10.12 or later
How to Record Streaming with Wondershare Filmora
Step 1: Download and Install Filmora
To begin with the Wondershare Filmora video recorder, you need to download the software. After you have downloaded the Wondershare Filmora file, it is time to install the program. To do so, open the downloaded file and follow the usual instructions to proceed further. After you are done with the installation, access the masterpiece from your desktop.
Step 2: Set Up Your Screen
After starting Wondershare Filmora, you should see the following interface. Now you need to click on the Capture button, to begin with capturing your video screen:
Select the screen area which you wish to capture in your final film. Customize the parameters of your recording in the corner settings box with the Filmora title. Just click on the options tab and adjust your recordings as you wish.
Step 3: Start Capturing
Step 3: Start Capturing
After you are done with the settings, launch the game which you want to incorporate in your game video production. As soon as you arrive at the game, go with the game interface until you want it to include.
Just press the red-dotted Filmora button as soon as you get to a place where you wish to record your game playthrough. Now that you’ve completed this step, you may begin capturing your screen.
Step 4: Directly Share to YouTube
The post-production editing capability may also be used to improve the recording. There are a few ways to do this, such as by clicking Export at the top of a video editor’s interface and then following the on-screen instructions. For easy uploading to a social media network like YouTube, just choose the video in the list and login into your channel.
Conclusion
Unlike OBS, which only offers a few recording options, Filmora includes all of them. You may also add screen inscriptions and your camera footage as an overlay to the material you are recording using this feature. This device is also capable of capturing audio from the receiver. In just a few seconds, you may capture images and videos from your computer’s screen, make comments, and share them with others. You’ll need to put in some effort to figure out how OBS works. In comparison to other screen capturing apps, this one is unquestionably more difficult to use. For this reason, we’ve compiled the best of the top OBS alternative for your perusal – Wondershare Filmora. Whether you want to record your interaction, capture the video on your PC, or broadcast it live, an all-in-one OBS alternative has an option for you.
For macOS 10.12 or later

How to Record Streaming with Wondershare Filmora
Step 1: Download and Install Filmora
To begin with the Wondershare Filmora video recorder, you need to download the software. After you have downloaded the Wondershare Filmora file, it is time to install the program. To do so, open the downloaded file and follow the usual instructions to proceed further. After you are done with the installation, access the masterpiece from your desktop.
Step 2: Set Up Your Screen
After starting Wondershare Filmora, you should see the following interface. Now you need to click on the Capture button, to begin with capturing your video screen:
Select the screen area which you wish to capture in your final film. Customize the parameters of your recording in the corner settings box with the Filmora title. Just click on the options tab and adjust your recordings as you wish.
Step 3: Start Capturing
Step 3: Start Capturing
After you are done with the settings, launch the game which you want to incorporate in your game video production. As soon as you arrive at the game, go with the game interface until you want it to include.
Just press the red-dotted Filmora button as soon as you get to a place where you wish to record your game playthrough. Now that you’ve completed this step, you may begin capturing your screen.
Step 4: Directly Share to YouTube
The post-production editing capability may also be used to improve the recording. There are a few ways to do this, such as by clicking Export at the top of a video editor’s interface and then following the on-screen instructions. For easy uploading to a social media network like YouTube, just choose the video in the list and login into your channel.
 The BootIt Collection covers multi-booting, partitioning, and disk imaging on traditional PC’s using the standard BIOS and newer PC’s using UEFI. The collection includes BootIt Bare Metal (BIBM) for standard BIOS systems and BootIt UEFI (BIU) for UEFI system.
Conclusion
Unlike OBS, which only offers a few recording options, Filmora includes all of them. You may also add screen inscriptions and your camera footage as an overlay to the material you are recording using this feature. This device is also capable of capturing audio from the receiver. In just a few seconds, you may capture images and videos from your computer’s screen, make comments, and share them with others. You’ll need to put in some effort to figure out how OBS works. In comparison to other screen capturing apps, this one is unquestionably more difficult to use. For this reason, we’ve compiled the best of the top OBS alternative for your perusal – Wondershare Filmora. Whether you want to record your interaction, capture the video on your PC, or broadcast it live, an all-in-one OBS alternative has an option for you.
- Title: [Updated] In 2024, Getting Started with OBS on Apple A Comprehensive Guide
- Author: Mary Shelley
- Created at : 2024-07-19 09:13:18
- Updated at : 2024-07-20 09:13:18
- Link: https://screen-sharing-recording.techidaily.com/updated-in-2024-getting-started-with-obs-on-apple-a-comprehensive-guide/
- License: This work is licensed under CC BY-NC-SA 4.0.