![[New] Secure Your Memories Long-Term Webcam Video Storage in VLC for 2024](https://thmb.techidaily.com/b77f4a1b111b54e2805878ed9aa3d1afc9409a9f5cc36ff257194dcf6821d1ac.jpg)
"[New] Secure Your Memories Long-Term Webcam Video Storage in VLC for 2024"
Secure Your Memories: Long-Term Webcam Video Storage in VLC
The VLC media player is an absolute gem of the program, which every user must have used. The main thing about this app is playing every media format virtually. But there are numerous features that you might not know. For instance, users can also record their desktop and convert the videos to various formats. And hence, if you wish to opt for recording using your laptop with an already equipped microphone, camera, and more, this software will do that for you in minutes.
Today, we will look at the step-by-step process to record webcam VLC. Also, we will discuss a few alternative options that you may put to use for the same.However, at first, let’s see how to record your webcam with VLC:
Part 1. VLC Webcam Recording Guide
Part 2. VLC Alternatives to Record Webcam
Part 1. VLC Webcam Recording Guide
VLC player is one of the best recording software for beginners to experts. You can do everything on this single app. If you are searching for software to record videos from a webcam, it is one of the best choices. Let’s start with how to record webcam VLC.
Step 1: - First, you update our webcam’s firmware. Once you have completed it, you can launch the VLC, visit the view tab, and check out the advanced controls. It will help you put some extra toolbar with the record button on the left corner.
Step 2: - Next, visit media and click on the capture device.

Step 3: - Now, keep the capture mode as the “DirectShow” and select the audio input and video camera device from the menu.
You can use any device for both audio and video. It depends upon the setup, and you will choose between various video and audio devices. You must select the right one according to your setup.
Step 4: - Another option you may want is to select the Advanced options button and then plug in the specific framerate for a video. You can set it up around 30fps, and then you can do a great job by keeping the size of the video file down. You may have to experiment with it a few times to get the best video quality you wish.
Step 5: - Once you have finished the selection of your video and audio device and set up the frame rate down, then click the Play button.
Step 6: - You will have to see yourself or anything you pointed your camera at the main windows. Then, you will have to hit the record button on the toolbar, which you can add earlier for starting the recording.
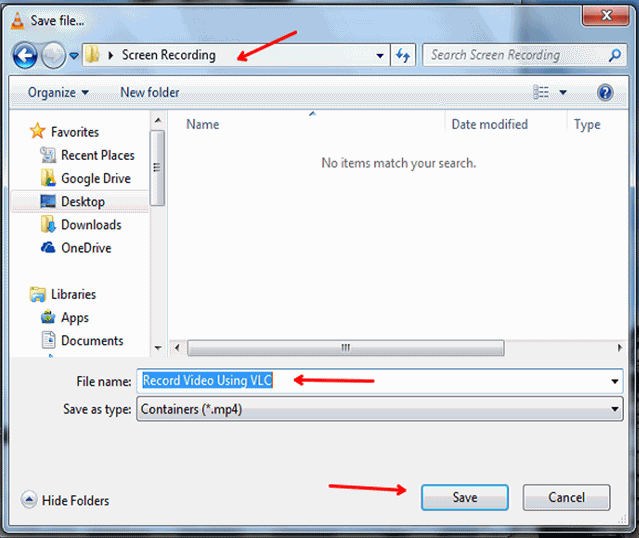
Step 7: - For stopping the recording, you will have to hit stop or record again to close the video recording completely. The users will have to find the recording in local video folders on the PC saved as the AVI files.
Step 8: It is worth noting that if you plan to record your voice, you will have to wear the headset or manage the audio device. Otherwise, the user will hear the voice’s echo through external speakers. The process is very similar for recording the desktop, but you have to choose various media devices.
In addition, you will need the recording in other formats, and you can also. Finally, use the VLC for converting the videos. VLC record from webcam is completed.
Part 2. VLC Alternatives to Record Webcam
1. Filmora
People perform various tasks on their PC daily, but they rarely get the opportunity to share them with other people. But, Windows 10 offers a great tool that enables PC users to record the all-screen activities and a webcam with a single click of a button. This screen recording tool allows the users to record webcam videos. In addition, it captures screen videos simultaneously so that the users can record their gameplay of video games or create tutorials.
The PC users also have a wide variety of screen capturing tools that can be used either free or by giving a fee. In addition, the Filmora video recording software offers recording functionality that enables the user to record the computer screen and webcam simultaneously.
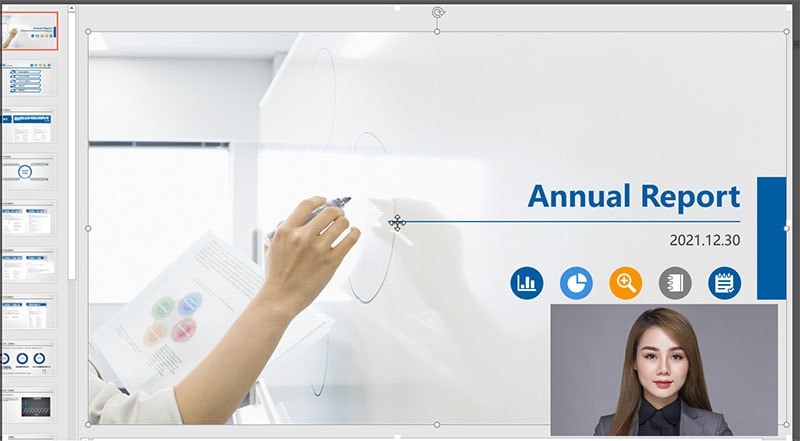
Step 1: First, you will have to download and install the software on the PC. Next, launch your application and then click on the new project. Next, you must head to Media Tab. Finally, click on Record from the menu, located near the import menu.
Step 2: You can select the recorded video using the external or built-in webcam. Select the Record from the webcam, and windows will pop up.
Step 3: Click on the settings icon on the right corner of the window if you wish to set a frame rate of videos you are recording. The screen recorder will allow the recording of the webcam video.
Step 4: You can also set up keyboard shortcuts, enabling the user to pause, stop, start and resume the webcam recording. You can click on the record button when it is ready and then proceed with recording the webcam and screen simultaneously.
For Win 7 or later (64-bit)
For macOS 10.12 or later
2. QuickTime
If you search for a simple and easy-to-use recorder, you can always keep QuickTime as a first choice. Apple also includes a screen recorder in MacOS. This is one of the most reliable recorders and also a video player. This is a very quick and easy recorder for free. You only have to launch QuickTime and then File and start your recording. After that, you will see the pop-up for the screen recording menu. It is as simple as that.
The QuickTime also comes with great editing tools like rotation, trimming, and splitting. The user can also add some clips to the sequence for combining the videos with other videos. If you are searching for an exporting format other than MOV format, you will have to find a video converter.
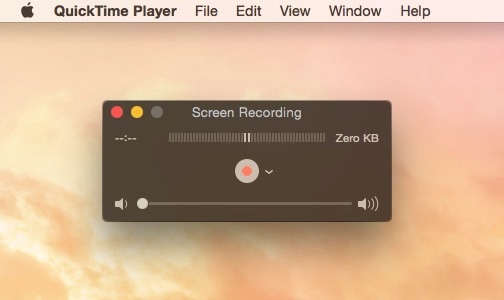
Step 1: In the QuickTime plays, you will have to click on the File and click on the new recording.
Step 2: You will have to make sure that the webcam is on. The recording window appears along with the camera view. You can click on the down arrow for adjusting the settings and then click the record button to start the recording. You can then click again to stop the recording.
Step 3: Once you have finished recording, you can click on the record button to edit the whole video. Video can also be cut or rotated.
Step 4: Once you have finished editing, save your video. Default format saves as. MOV file. You can export File if various format is required.
3. Logitech Capture
Nearly every desktop and laptop come with an inbuilt webcam. That’s why no one thinks to purchase another webcam. But if the inbuilt camera is not ideal for creating basic and simple videos, you might need some comprehensive solutions.
There are some third-party cameras, but the Logitech is one of the best to choose for a webcam that offers uninterrupted, smooth, and crisp video live streaming.
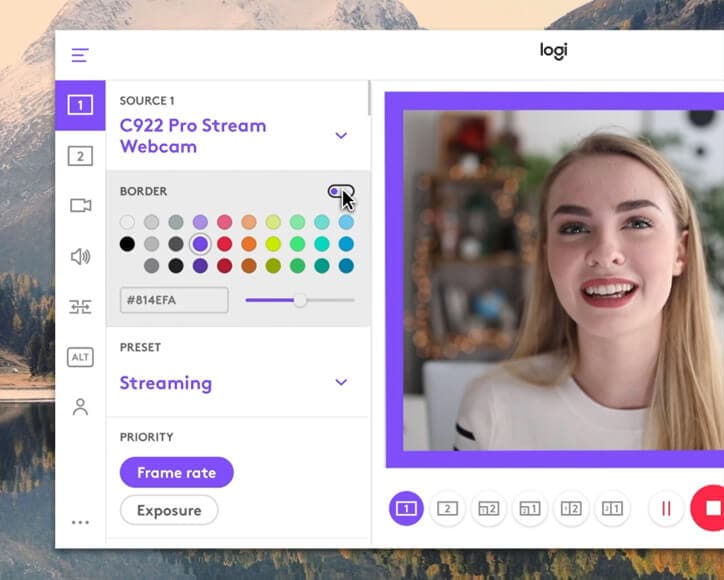
Step 1: If installation gets completed, open up Webcam software. If you wish to record the video or screenshots, you will have to click “Quick Capture.” If you want to hire the captured videos, visit the Webcam gallery.
Step 2: You can even use Logitech for making a call by just clicking on Make video call for additional options. These features are only available if you install the HD software.
Step 3: You will have to click on adjust the webcam settings and select the “Preferences” for adjusting the video. For example, you might adjust audio preferences and video quality on the webcam.
FAQs
How to record the webcam on Mac devices?
Ans: You can go for QuickTime player to get the best webcam recording as it is an inbuilt software. You will not even have to download an extra app.
Which FPS rate is best for Webcam recording in VLC?
Ans: You can set 30fps to Record from webcam VLC to get the smooth, uninterrupted, and crisp video quality.
In which format does VLC save the file?
Ans: If you Record with VLC webcam, VLC media player saves the file in AVI file format.
Conclusion
In this article, we have provided some software to record the video from the webcam. You can choose the VLC media player to record the video from the webcam, and if your desktop doesn’t support the VLC player, you can also go for the record video with VLC webcam alternative. Check out the steps to record video with a webcam to make your task easy.
Part 2. VLC Alternatives to Record Webcam
Part 1. VLC Webcam Recording Guide
VLC player is one of the best recording software for beginners to experts. You can do everything on this single app. If you are searching for software to record videos from a webcam, it is one of the best choices. Let’s start with how to record webcam VLC.
Step 1: - First, you update our webcam’s firmware. Once you have completed it, you can launch the VLC, visit the view tab, and check out the advanced controls. It will help you put some extra toolbar with the record button on the left corner.
Step 2: - Next, visit media and click on the capture device.
Step 3: - Now, keep the capture mode as the “DirectShow” and select the audio input and video camera device from the menu.
You can use any device for both audio and video. It depends upon the setup, and you will choose between various video and audio devices. You must select the right one according to your setup.
Step 4: - Another option you may want is to select the Advanced options button and then plug in the specific framerate for a video. You can set it up around 30fps, and then you can do a great job by keeping the size of the video file down. You may have to experiment with it a few times to get the best video quality you wish.
Step 5: - Once you have finished the selection of your video and audio device and set up the frame rate down, then click the Play button.
Step 6: - You will have to see yourself or anything you pointed your camera at the main windows. Then, you will have to hit the record button on the toolbar, which you can add earlier for starting the recording.
Step 7: - For stopping the recording, you will have to hit stop or record again to close the video recording completely. The users will have to find the recording in local video folders on the PC saved as the AVI files.
Step 8: It is worth noting that if you plan to record your voice, you will have to wear the headset or manage the audio device. Otherwise, the user will hear the voice’s echo through external speakers. The process is very similar for recording the desktop, but you have to choose various media devices.
In addition, you will need the recording in other formats, and you can also. Finally, use the VLC for converting the videos. VLC record from webcam is completed.
Part 2. VLC Alternatives to Record Webcam
1. Filmora
People perform various tasks on their PC daily, but they rarely get the opportunity to share them with other people. But, Windows 10 offers a great tool that enables PC users to record the all-screen activities and a webcam with a single click of a button. This screen recording tool allows the users to record webcam videos. In addition, it captures screen videos simultaneously so that the users can record their gameplay of video games or create tutorials.
The PC users also have a wide variety of screen capturing tools that can be used either free or by giving a fee. In addition, the Filmora video recording software offers recording functionality that enables the user to record the computer screen and webcam simultaneously.
Step 1: First, you will have to download and install the software on the PC. Next, launch your application and then click on the new project. Next, you must head to Media Tab. Finally, click on Record from the menu, located near the import menu.
Step 2: You can select the recorded video using the external or built-in webcam. Select the Record from the webcam, and windows will pop up.
Step 3: Click on the settings icon on the right corner of the window if you wish to set a frame rate of videos you are recording. The screen recorder will allow the recording of the webcam video.
Step 4: You can also set up keyboard shortcuts, enabling the user to pause, stop, start and resume the webcam recording. You can click on the record button when it is ready and then proceed with recording the webcam and screen simultaneously.
For Win 7 or later (64-bit)
For macOS 10.12 or later
2. QuickTime
If you search for a simple and easy-to-use recorder, you can always keep QuickTime as a first choice. Apple also includes a screen recorder in MacOS. This is one of the most reliable recorders and also a video player. This is a very quick and easy recorder for free. You only have to launch QuickTime and then File and start your recording. After that, you will see the pop-up for the screen recording menu. It is as simple as that.
The QuickTime also comes with great editing tools like rotation, trimming, and splitting. The user can also add some clips to the sequence for combining the videos with other videos. If you are searching for an exporting format other than MOV format, you will have to find a video converter.
Step 1: In the QuickTime plays, you will have to click on the File and click on the new recording.
Step 2: You will have to make sure that the webcam is on. The recording window appears along with the camera view. You can click on the down arrow for adjusting the settings and then click the record button to start the recording. You can then click again to stop the recording.
Step 3: Once you have finished recording, you can click on the record button to edit the whole video. Video can also be cut or rotated.
Step 4: Once you have finished editing, save your video. Default format saves as. MOV file. You can export File if various format is required.
3. Logitech Capture
Nearly every desktop and laptop come with an inbuilt webcam. That’s why no one thinks to purchase another webcam. But if the inbuilt camera is not ideal for creating basic and simple videos, you might need some comprehensive solutions.
There are some third-party cameras, but the Logitech is one of the best to choose for a webcam that offers uninterrupted, smooth, and crisp video live streaming.
Step 1: If installation gets completed, open up Webcam software. If you wish to record the video or screenshots, you will have to click “Quick Capture.” If you want to hire the captured videos, visit the Webcam gallery.
Step 2: You can even use Logitech for making a call by just clicking on Make video call for additional options. These features are only available if you install the HD software.
Step 3: You will have to click on adjust the webcam settings and select the “Preferences” for adjusting the video. For example, you might adjust audio preferences and video quality on the webcam.
FAQs
How to record the webcam on Mac devices?
Ans: You can go for QuickTime player to get the best webcam recording as it is an inbuilt software. You will not even have to download an extra app.
Which FPS rate is best for Webcam recording in VLC?
Ans: You can set 30fps to Record from webcam VLC to get the smooth, uninterrupted, and crisp video quality.
In which format does VLC save the file?
Ans: If you Record with VLC webcam, VLC media player saves the file in AVI file format.
Conclusion
In this article, we have provided some software to record the video from the webcam. You can choose the VLC media player to record the video from the webcam, and if your desktop doesn’t support the VLC player, you can also go for the record video with VLC webcam alternative. Check out the steps to record video with a webcam to make your task easy.
Also read:
- [New] 2024 Approved Reviving the Full Screen in OBS
- [New] Streamlined Mac Package Audio + Video Capture
- [Updated] Driving Engagement for Social Media Stardom for 2024
- [Updated] Ethical Considerations for Saving WhatsApp Conversations for 2024
- [Updated] In 2024, Recording Wonders Lightweight Win 11 Edition
- [Updated] Mastering Video Spin VLC's Rotation Guide for 2024
- [Updated] Thor's Mighty Saga Ragnarok Dawns for 2024
- 2024年如何战略性地录制英雄联盟(LoL)比赛 - 专业技巧指南
- Effortless Setup for Thrustmaster T150 Drivers - Get Downloads Now!
- How To Fix OEM Unlock Missing on Xiaomi 14?
- In 2024, The Artisan's Guide to Creating Sound Alterations Without Cost
- In 2024, Which Is Superior for Screen Recording – OBS Studio or Fraps?
- Rogue Company PC Crash Woes? Discover Effective Solutions Now
- The Best Android Unlock Software For Honor X9b Device Top 5 Picks to Remove Android Locks
- Ultimate Strategy for Purging Connections on iCloud - A Detailed Exploration
- Title: [New] Secure Your Memories Long-Term Webcam Video Storage in VLC for 2024
- Author: Mary Shelley
- Created at : 2025-01-06 23:54:58
- Updated at : 2025-01-13 21:19:28
- Link: https://screen-sharing-recording.techidaily.com/new-secure-your-memories-long-term-webcam-video-storage-in-vlc-for-2024/
- License: This work is licensed under CC BY-NC-SA 4.0.