
"2024 Approved Best Way to Perform OBS Streaming"
Best Way to Perform OBS Streaming
OBS, which stands for Open Broadcaster Software, is a free, open-source software package that allows you to record and broadcast what is shown on your computer screen, as well as content from other locations. You may broadcast to services such as YouTube or Twitch, as well as a record in a variety of formats that you can edit afterward or post to video-sharing websites like Vimeo. OBS studio streaming is compatible with the Mac operating system; however, for beginners, the setup is substantially more complicated than it would be on a PC. Open Broadcaster Software (OBS Studio), often known as Open Broadcaster Software, is the go-to tool for anybody who wants to broadcast live. However, because of its sophisticated interface and professional features, only a small number of individuals are familiar with how to use it.
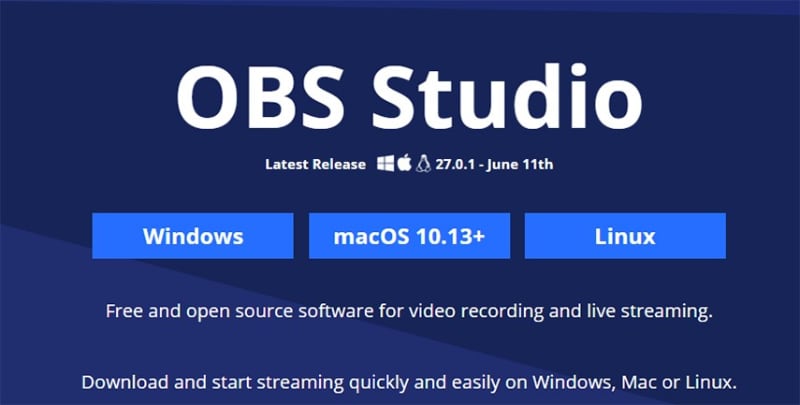
With this guide, you can easily learn about how to use stream elements OBS as a virtual camera for video conferencing platforms, which we believe is due to the growing number of people working from home in the current global economy. Are there any specific moments that you want to share with people when you’re playing video games? Streaming on websites such as Twitch or YouTube is a good alternative since it may help you connect with more people who have similar interests to you and because it allows you to communicate with your audience in real-time. To use the application, you must first get a copy of it from the OBS website. To get OBS live stream software, access the site by going to OBSproject.com and selecting the ‘download’ option in the top right-hand corner, between the options for “blog” and “home.” When you arrive at this page, you’ll be greeted with three logos in the center of the screen, representing Windows, Mac, and Linux.
Filmora Audio Recorder
Record computer system audio
Capture microphone audio
Customize recording volume
Record screen and webcam as well
1. How to Stream with OBS on Windows
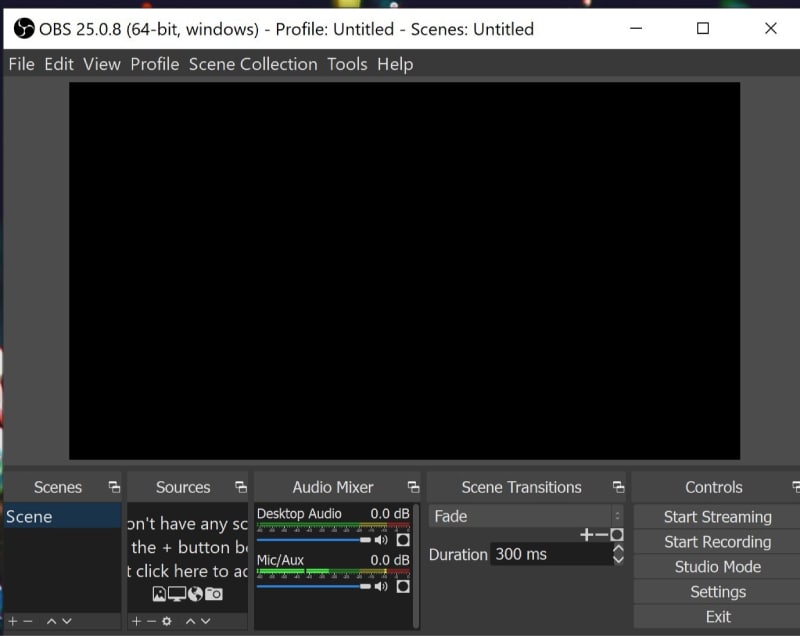
When you first start using OBS, you may be overwhelmed by the sheer number of options available and the number of settings that are required. In this piece, we’ll go over some of those choices, as well as the values that you’ll want to put into play. The most important configuration options can be found under the ‘Output’ tab of the ‘Settings’ menu. On this page, you can customize the majority of the visual and audio features available.
Step 1: Install and Launch OBS
Launch OBS Studio and select the “Stream” tab from the “File” menu on the top toolbar. Step 2: Launch OBS Studio and select the “File” menu again. It allows you to select “Twitch” from the dropdown menu of the “Service” option right away.
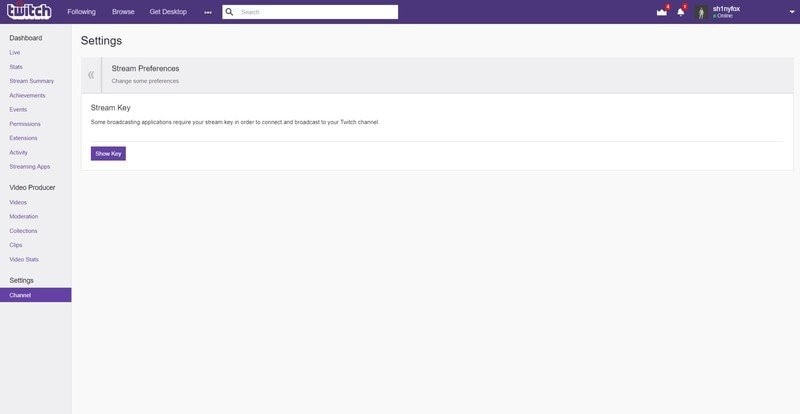
Step 2: Setup OBS for Twitch
There is a button that says “Connect Account (recommended).” Log in to your Twitch account by clicking on the link. Creating a connection between Twitch and OBS is the most straightforward method, but it is also possible to click on the “Use Stream Key” box and enter the stream key provided by Twitch. The Output (Scaled) Resolution is the resolution at which you want your stream to be displayed on your screen. As an example, if you want to broadcast in 720p, you would set the resolution to 1280 x 720. Similarly, if you want it to be a 1080p broadcast, change the resolution to 1920 x 1080.
Step 3: Add Streaming Scenes
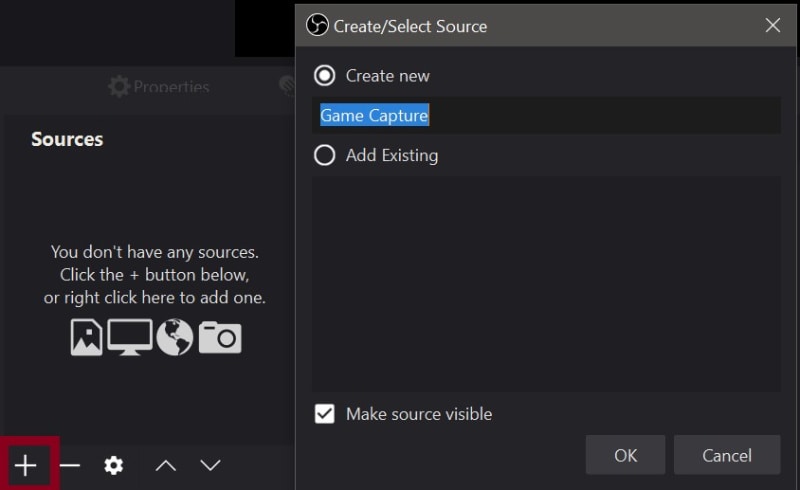
You are now in the second step, which is to configure OBS Studio to its optimal streaming settings for live streaming. When you are back in the OBS main interface, tap the “+” icon in the “Source” area, and then select the video source that you want to use for streaming. The best audio quality is essential for any type of live streaming, so setting the bitrate to the highest possible setting will ensure that your viewers hear the best possible sound. Unless you are streaming video rather than music, 160 Kbps is the recommended bitrate on most websites.

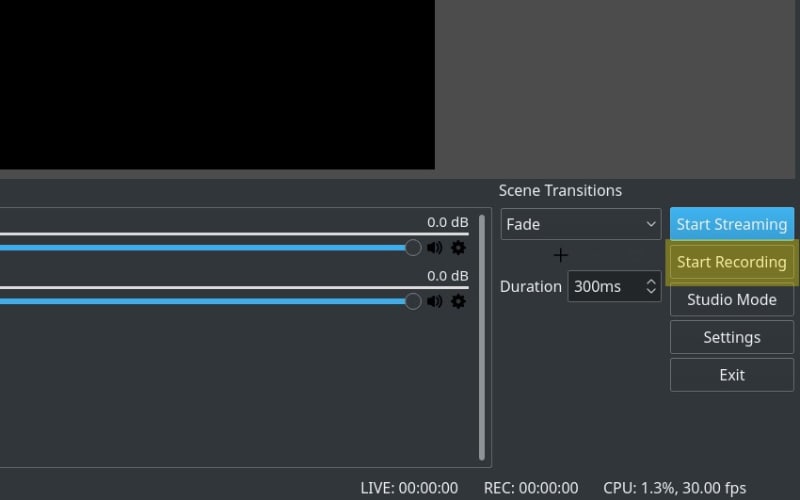
Step 4: Start Streaming
Select Stream from the drop-down menu and enter the necessary information. Click on “Start Streaming” after selecting the appropriate video source for streaming on Twitch to begin a live broadcast on the platform. The Video tab is where you can change the resolution of the stream as well as the number of frames per second it broadcasts. This is also the location where you will resize the broadcast if you so choose.
2. How to Stream with OBS on Mac
To get started, visit the official OBS (Open Broadcaster Software) website, which can be accessed by clicking here. Choose Mac OS as your operating system and download the installation. After a few seconds, the OBS installer will download to your computer, which you will then need to install on your computer. After you have downloaded and installed the installer, you should be able to launch OBS Studio without any problems. Your Mac will begin performing some operations and then launch a new finder window, which will display the OBS program as well as the contents of your apps folder. The OBS software will automatically install itself if you simply drag and drop it into the Applications folder. You can now click on your launchpad icon in your toolbar (the icon has lots of little colorful squares within it) and you will see that OBS has been successfully installed and is ready to use!
Step 1: Install and Launch OBS on Mac
Select ‘Open System Preferences from the drop-down menu. This will take you to the privacy settings page for your account. Take note of the fact that the OBS Studio logo is located on the right-hand side of the screen and has been greyed out. We’re going to want to select that option to enable screen-recording functionality. To enable display capture, simply check the tiny box next to OBS. You’re now ready to record your screen! If the prompt did not appear for you when you were adding a display capture, go to your system options and select ‘Privacy and Security to bring up the same menu option as before.
Step 2: Add Scenes on OBS
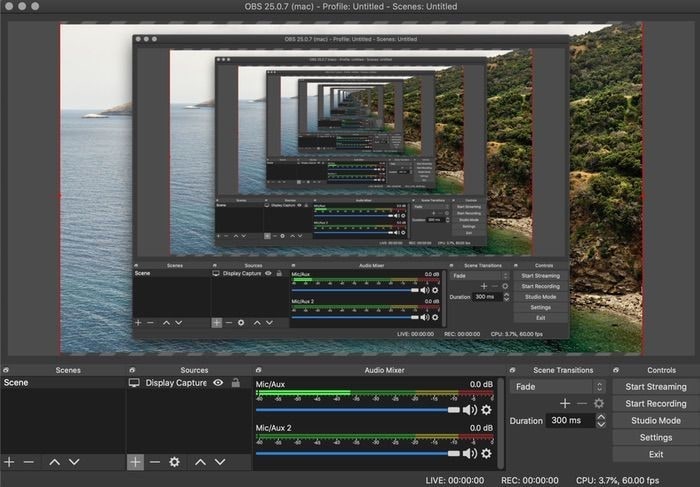
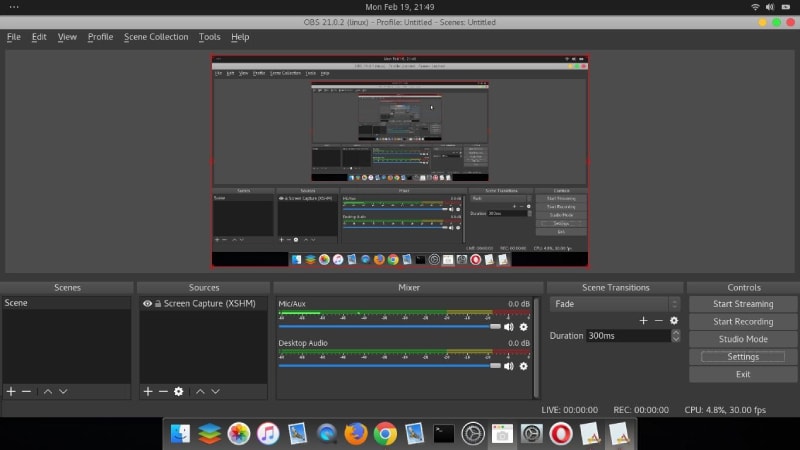
You will see an option for ‘recording path’ on the left-hand side. Select the folder on your Mac where you want to keep all of your OBS recordings by clicking explore and selecting the folder on your computer. We’d recommend using your Mac’s default video location as a starting point. In your Sources section, select the + icon to add a new source. This will bring up a drop-down menu, from which you can choose from a variety of different sources. If you want to record your screen, select the Display Capture source from the menu bar.
Step 3. Start a Stream
If you’re using OBS to broadcast, it’s recommended that you link your account directly with OBS to have the smoothest streaming experience possible. You are effectively connecting into OBS with your streaming account to establish a direct connection between your feed and your software, which is what this means in practical terms.
To do so, navigate to the settings menu and select the ‘Stream’ tab. To connect an account, select your preferred streaming platform from the ‘service’ drop-down menu and then click ‘Connect Account (recommended). This will launch your internet browser and prompt you to log in with the information associated with your stream account. Once you’ve finished, you’ll be fully connected and ready to stream.
Step 4: Save Your Streaming Settings
Navigate to your OBS Studio settings, which must be optimized for your network connection and available resources. Save your changes. Scroll down to the Output tab, and make sure the Advanced output mode is selected on the output mode drop-down menu. On the Performance tab, you should be able to see how much stress your CPU and GPU are under. When streaming or recording, don’t forget to take into consideration any applications that are already running on your system, such as graphically intensive games.
Conclusion
While the information in this tutorial provides some fundamental concepts, the optimal OBS settings for streaming vary from system to system. The most effective way to figure out what works for you is to experiment with different settings regularly and track the results. The parameters provided in this article should allow you to receive an acceptable quality stream from OBS if you follow the instructions in the article. If, on the other hand, you or your viewers notice stuttering or an unusual frame rate during your live broadcast, you may be losing frames. A ‘Dropped Frames’ value can be found at the bottom right of the OBS program if you look at the bottom right of the software. If this value is greater than zero percent, your stream will experience difficulties. OBS makes use of the x264 encoding library, which is available as open-source software. Software video encoding is the term used to describe this process.
1. How to Stream with OBS on Windows
When you first start using OBS, you may be overwhelmed by the sheer number of options available and the number of settings that are required. In this piece, we’ll go over some of those choices, as well as the values that you’ll want to put into play. The most important configuration options can be found under the ‘Output’ tab of the ‘Settings’ menu. On this page, you can customize the majority of the visual and audio features available.
Step 1: Install and Launch OBS
Launch OBS Studio and select the “Stream” tab from the “File” menu on the top toolbar. Step 2: Launch OBS Studio and select the “File” menu again. It allows you to select “Twitch” from the dropdown menu of the “Service” option right away.
Step 2: Setup OBS for Twitch
There is a button that says “Connect Account (recommended).” Log in to your Twitch account by clicking on the link. Creating a connection between Twitch and OBS is the most straightforward method, but it is also possible to click on the “Use Stream Key” box and enter the stream key provided by Twitch. The Output (Scaled) Resolution is the resolution at which you want your stream to be displayed on your screen. As an example, if you want to broadcast in 720p, you would set the resolution to 1280 x 720. Similarly, if you want it to be a 1080p broadcast, change the resolution to 1920 x 1080.
Step 3: Add Streaming Scenes
You are now in the second step, which is to configure OBS Studio to its optimal streaming settings for live streaming. When you are back in the OBS main interface, tap the “+” icon in the “Source” area, and then select the video source that you want to use for streaming. The best audio quality is essential for any type of live streaming, so setting the bitrate to the highest possible setting will ensure that your viewers hear the best possible sound. Unless you are streaming video rather than music, 160 Kbps is the recommended bitrate on most websites.
Step 4: Start Streaming
Select Stream from the drop-down menu and enter the necessary information. Click on “Start Streaming” after selecting the appropriate video source for streaming on Twitch to begin a live broadcast on the platform. The Video tab is where you can change the resolution of the stream as well as the number of frames per second it broadcasts. This is also the location where you will resize the broadcast if you so choose.
2. How to Stream with OBS on Mac
To get started, visit the official OBS (Open Broadcaster Software) website, which can be accessed by clicking here. Choose Mac OS as your operating system and download the installation. After a few seconds, the OBS installer will download to your computer, which you will then need to install on your computer. After you have downloaded and installed the installer, you should be able to launch OBS Studio without any problems. Your Mac will begin performing some operations and then launch a new finder window, which will display the OBS program as well as the contents of your apps folder. The OBS software will automatically install itself if you simply drag and drop it into the Applications folder. You can now click on your launchpad icon in your toolbar (the icon has lots of little colorful squares within it) and you will see that OBS has been successfully installed and is ready to use!
Step 1: Install and Launch OBS on Mac
Select ‘Open System Preferences from the drop-down menu. This will take you to the privacy settings page for your account. Take note of the fact that the OBS Studio logo is located on the right-hand side of the screen and has been greyed out. We’re going to want to select that option to enable screen-recording functionality. To enable display capture, simply check the tiny box next to OBS. You’re now ready to record your screen! If the prompt did not appear for you when you were adding a display capture, go to your system options and select ‘Privacy and Security to bring up the same menu option as before.
Step 2: Add Scenes on OBS
You will see an option for ‘recording path’ on the left-hand side. Select the folder on your Mac where you want to keep all of your OBS recordings by clicking explore and selecting the folder on your computer. We’d recommend using your Mac’s default video location as a starting point. In your Sources section, select the + icon to add a new source. This will bring up a drop-down menu, from which you can choose from a variety of different sources. If you want to record your screen, select the Display Capture source from the menu bar.
Step 3. Start a Stream
If you’re using OBS to broadcast, it’s recommended that you link your account directly with OBS to have the smoothest streaming experience possible. You are effectively connecting into OBS with your streaming account to establish a direct connection between your feed and your software, which is what this means in practical terms.
To do so, navigate to the settings menu and select the ‘Stream’ tab. To connect an account, select your preferred streaming platform from the ‘service’ drop-down menu and then click ‘Connect Account (recommended). This will launch your internet browser and prompt you to log in with the information associated with your stream account. Once you’ve finished, you’ll be fully connected and ready to stream.
Step 4: Save Your Streaming Settings
Navigate to your OBS Studio settings, which must be optimized for your network connection and available resources. Save your changes. Scroll down to the Output tab, and make sure the Advanced output mode is selected on the output mode drop-down menu. On the Performance tab, you should be able to see how much stress your CPU and GPU are under. When streaming or recording, don’t forget to take into consideration any applications that are already running on your system, such as graphically intensive games.
Conclusion
While the information in this tutorial provides some fundamental concepts, the optimal OBS settings for streaming vary from system to system. The most effective way to figure out what works for you is to experiment with different settings regularly and track the results. The parameters provided in this article should allow you to receive an acceptable quality stream from OBS if you follow the instructions in the article. If, on the other hand, you or your viewers notice stuttering or an unusual frame rate during your live broadcast, you may be losing frames. A ‘Dropped Frames’ value can be found at the bottom right of the OBS program if you look at the bottom right of the software. If this value is greater than zero percent, your stream will experience difficulties. OBS makes use of the x264 encoding library, which is available as open-source software. Software video encoding is the term used to describe this process.
Also read:
- [New] 2024 Approved Navigate to the 5 Preferred Android PS2 Emulator Apps
- [New] In 2024, Get the Best Free PC Sound Logger – Download X-Recorder
- [Updated] Elite Applications Facilitating Video Discussions
- [Updated] In 2024, Discovering Chromebook's Best Digital Art Stations
- [Updated] In 2024, Winning Windows 10 Tools to Record Your Display
- [Updated] Sorbet Snapshot Guide A Thorough Examination of Screen Recorder
- 2024 Approved Phones to Cameras Enhancing Your Live Stream Setup
- 2024 Approved Say Laughs, Say Free - MemeMaker's Tutorial
- 2024 Approved Top 9 Secure Virtual Meeting Solutions for Startups
- 4 Ways to Enable or Disable NTFS File Compression in Windows 11
- Does Spending on Luxury AI Prompts Yield Benefits Worth Paying For?
- How to Leverage Twitter with These Easy-to-Use Hashtag Monitoring Tools (#SuccessGuide)
- How to Screen Mirroring Realme C53? | Dr.fone
- How To Unlock Xiaomi Civi 3 Disney 100th Anniversary Edition Phone Without Password?
- Overcoming Total VRChat Failure: A Step-by-Step Guide to Fixing Launch Problems
- Reel in Quality Essential Audio Devices for Podcast Producers
- Unleash Window History An In-Depth Look at Spring's Tech
- Title: 2024 Approved Best Way to Perform OBS Streaming
- Author: Mary Shelley
- Created at : 2024-12-22 09:57:37
- Updated at : 2024-12-23 10:17:33
- Link: https://screen-sharing-recording.techidaily.com/2024-approved-best-way-to-perform-obs-streaming/
- License: This work is licensed under CC BY-NC-SA 4.0.